












How To Laser Engrave Cattle Ear Tags
The biggest challenge with laser engraving cattle ear tags is that modern livestock tags are typically made of flexible, UV-stabilized polyurethane plastic. That's usually a bit of a problem, because plastic isn't the most forgiving material for laser engraving: the intense heat of the laser can cause many types to melt, warp, or even scorch instead of engraving cleanly.
That said, laser engraving ear tags is completely achievable. With the right laser engraving machine, you can produce highly permanent, crisp, high-contrast identification markings on cattle ear tags that hold up to harsh outdoor conditions without fading. The key to a clean mark comes down to three things: using the correct type of laser, stabilizing the material, and balancing your settings to avoid melting.

What Are The Best Laser Engravers For Cattle Ear Tags?
Generally, there are two choices when it comes to picking a laser engraver for ear tags: a fiber laser engraver or a CO2/diode laser. Which one you need depends on the material the tags are made of, the tag's physical design, and the volume of tags you intend to engrave.
1. Fiber / MOPA Lasers: Best for Speed and Bulk
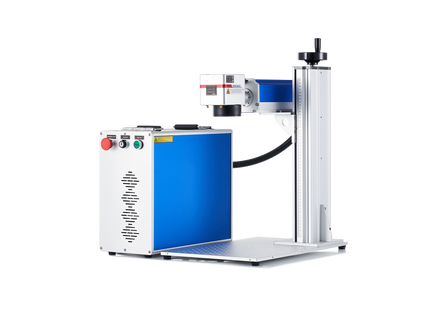
If you're making shallow engravings on ear tags and want to work quickly, a fiber or MOPA laser engraver is the best choice. A 20W to 100W fiber laser doesn't actually cut or carve into the tag; instead, it reacts chemically with specialized additives inside standard commercial polyurethane plastics, changing the plastic's color to black.
This produces an ultra-fast, perfectly flat, surface-level mark that can take as little as 30 seconds per tag. For context, a 20W to 30W fiber galvo laser can finish a custom tag in under 30 seconds.
For ranchers running a side business or tagging large herds, a fiber laser is generally the better fit for standard, single-layer tags, since it works by triggering a color-change reaction that turns the plastic a deep jet-black rather than relying on heat alone.
2. CO2 / Diode Lasers: Best for Dual-Layer Tags
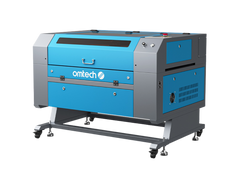
For multilayer ear tags, like Ritchey tags, you'll want a smaller desktop CO2 laser engraver, or diode laser, with at least 20W recommended for production-level speeds. These lasers work through a physical ablation process: the laser burns through the top layer to permanently reveal the high-contrast inner core color. This makes them especially effective on multi-layered tags such as Ritchey tags, which feature a colored outer layer bonded to a black or white inner core.
How To Engrave Ear Tags For Cattle: Two Methods
There are two main approaches to laser engraving ear tags, and which one applies to you depends on the type of laser engraver you're using and the volume of tags you intend to engrave.
Method 1: The "Ritchey Tag" (Hobbyist Diode) Method
This method is mostly used by ranchers using diode lasers (in the 10W–20W range) to engrave dual-layer Ritchey cattle ear tags almost exclusively. It works because Ritchey tags have a colored outer layer over a contrasting inner core; the laser burns away the top layer to reveal the color underneath.
- General settings example: for a 10W diode, engrave at about 4,800 mm/min at 100% power using a dense crosshatch pattern. This can take 12 to 15 minutes per tag; a 20W or higher laser speeds this up significantly.
- The caveat: diode lasers won't cleanly mark standard, single-layer polyurethane tags (like Allflex); they'll melt the plastic rather than triggering the color-change reaction that fiber lasers rely on.
Method 2: The Commercial (Fiber Laser) Method
This approach uses fiber laser engravers for commercial-grade ear tag engraving and is generally the choice for higher-volume or production settings rather than one-off hobbyist jobs (see the Fiber/MOPA section above for how these machines handle standard, single-layer tags at scale).
General Settings for Laser Engraving Ear Tags
The exact settings for laser engraving leather ear tags vary depending on the wattage of your laser engraver, the tag's manufacturer, material, and color. It's always best to run a small test grid on a scrap tag to dial in your parameters, but here are some verified baselines to get you started:
| Laser Type | Power | Speed | Passes / Density | Expected Outcome |
| 20W/30W Fiber Laser | 50%–70% | 575–1,200 mm/s | 1 pass, high line density | Smooth, non-textured chemical color change (turns black) |
| 100W MOPA Fiber | 60% | 100% speed (galvo) | Freq: 1%, Waveform: 4, Spacing: 0.0003" | Lightning-fast batch processing, under 30 seconds per tag |
| 20W Diode / CO2 | 80%–100% | 250–400 mm/s | 2–3 passes | Physically vaporizes the outer layer of dual-layer tags |
Top Ear Tag Engraving Tips for Success: Jigs, Fixturing, and Workflow
Flexible plastic cattle tags rarely sit perfectly flat, which can throw off your laser's focus and distort the graphic.
- Build a custom jig. Always use a dedicated positioning jig to process tags uniformly. You can easily laser-cut a custom nesting tray out of scrap plywood, MDF, or acrylic that securely locks the specific silhouette of your ear tags into place.
- Use flattening extensions. For tags with thick, curved top necks, secure them to your jig with masking tape or integrated mechanical side-clamps to keep the engraving surface completely flat and uniform.
- Follow a cleanup workflow. If you're engraving dual-layer tags (CO2/diode), a layer of sticky soot will remain afterward. Wipe the completed tags down firmly with denatured alcohol and a shop microfiber rag; this lifts away the melted residue and leaves behind a razor-sharp, contrasting mark.
- Watch the heat (prevent bubbling). If the engraving looks bubbly, sticky, or messy, your settings are running too hot; either increase your speed or lower your power.
- Always run a test grid. Different tag manufacturers use slightly different plastic compositions. Set aside a few extra tags purely for sacrificial testing to dial in the perfect power-to-speed balance.
- Follow the double-pass rule for dual-layer tags. Two lighter passes yield a much cleaner result than one heavy pass; the first pass breaks the top layer, and the second cleans out the residue to expose the contrasting color underneath.
- Clean up with alcohol. After engraving dual-layer tags, they'll look soot-covered. Wipe them down thoroughly with denatured alcohol and a heavy-duty shop towel to reveal the sharp, bright contrast underneath.

How to Prevent Melting and Maximize Contrast When Laser Engraving Ear Tags
Polyurethane can melt quickly under a laser, and it tends to bubble or leave a charred, unreadable mess if too much localized heat builds up in one spot. Here are two effective ways to prevent melting and maximize contrast when laser engraving ear tags:
- Use the multi-pass strategy. If you're using a diode or CO2 laser, it's significantly safer to run 2 to 3 fast, lower-power passes rather than trying to blast through the top layer in one slow, high-power pass. This gives the plastic a brief moment to cool between passes and prevents structural warping.
- Try crosshatching. When engraving larger block-font text, use a crosshatch fill pattern (engraving at alternating 45° and 90° angles). This evenly distributes the energy and eliminates deep tool lines or melting gaps.
OMTech's Most Affordable Laser Engravers for Ear Tags
For a small to medium operation customizing livestock ear tags, the most common setup is a diode or CO2 laser, but choosing the right equipment (and understanding your plastic's safety profile) matters. For an affordable, reliable option, consider the OMTech K40+.
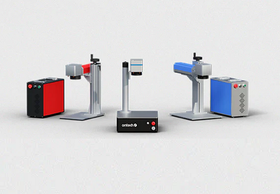
1. OMTech Galvo Autofocus Fiber Lasers: Affordable Mid-Range Fiber Laser Engravers for Metal Ear Tags
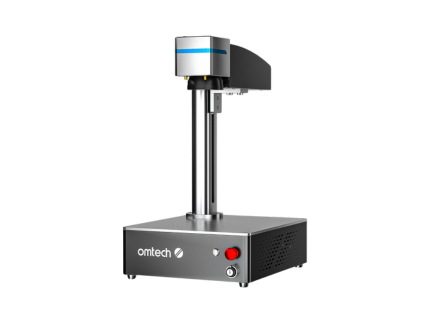
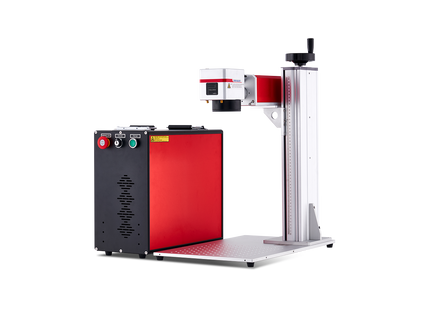
The OMTech FM Series Galvo Fiber Lasers contain Galvo autofocus fiber laser engraving machines ranging from 20W to 30W to 50W, each designed to be a great fit specifically for metal components: think RFID button tags, stainless steel dairy tags, or aluminum tag backers.
- Built for metal marking. These fiber lasers are designed to etch directly into metals (stainless steel, anodized aluminum, and coated alloys), producing dark, high-contrast marks that won't peel, fade, or wear off with years of outdoor exposure and animal contact.
- Autofocus removes the guesswork. One-click autofocus adjusts focal length automatically to ±1 mm accuracy, so every tag in a batch gets a properly focused mark without manual refocusing between pieces.
- High-speed marking for batch production. With engraving speeds up to 10,000 mm/s, this machine is built for volume, useful if you're marking ID numbers, herd codes, or barcodes across dozens or hundreds of tags before tagging season.
- Precision fine enough for small ID fields. A marking accuracy of ±0.01 mm keeps small text, sequential numbers, or compact barcodes sharp and readable, even on a tag's limited surface area.
- Durable, long-service laser source. The fiber laser source carries an estimated service life (MTTF) of 100,000 hours, so a machine used regularly for seasonal tagging isn't something you'll need to replace soon.
This is a Class 4 laser, so safety goggles are included, and proper enclosure/precautions matter given the power involved. The 20W model has a smaller processing area (4.3" x 4.3") than the 30W/50W (5.9" x 5.9"), which is plenty for small, uniform tag components, but check your tag dimensions against the field size before choosing wattage.

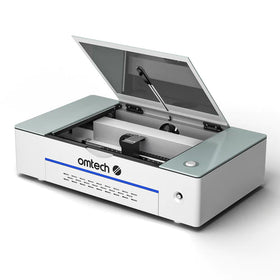
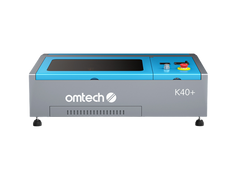
2. OMTech K40+ 45W CO2 Laser Engraver: Most Affordable CO2 Laser For Ear Tag Laser Engraving
The OMTech K40W CO2 Laser Engraver is a practical fit for ranchers, ag suppliers, and tag manufacturers who need to personalize tags in-house.
- Clean, permanent marks on plastic. The K40W's CO2 tube marks plastic by vaporizing a thin surface layer, leaving crisp, high-contrast text and numbers that won't fade, rub off, or wash away, unlike stamped or hand-written tags. That matters for ID tags that need to stay legible through years of sun, mud, and handling.
- Enough working area for batch runs. With a 12" x 8" (300 x 200 mm) bed, you can lay out and engrave a full batch of tags in one session instead of loading them one at a time, speeding up herd-tagging season prep.
- Precision that keeps IDs readable at a glance. At ±0.02 mm positioning accuracy, this laser etches small ID numbers, herd codes, or ranch brands cleanly and consistently across every tag, important when tags need to be read quickly from a distance or scanned.
- Fast enough for volume. A max engraving speed of 300 mm/s means you're not waiting long per tag, which adds up when you're processing dozens or hundreds ahead of tagging day.
A few practical notes
The K40+ is built for non-metal material, so it won't cut or mark bare or raw metal tag components, though it handles the plastic tag body well. Ear tags are small and often slightly curved at the edges, so a simple jig or flat template on the honeycomb workbed helps keep them positioned consistently across a batch.
Final Thoughts on Laser Engraving Ear Tags
Laser engraving cattle ear tags comes down to matching the right laser to the right tag: fiber and MOPA lasers for fast, flat, color-change marks on standard single-layer tags and metal hardware, and CO2 or diode lasers for burning through dual-layer tags like Ritchey to reveal the contrasting core underneath.
Whichever route you take, the fundamentals stay the same: stabilize the tag with a proper jig, run a test grid before committing to a full batch, and use multi-pass, lower-power settings to avoid melting or bubbling.
Get those basics right, and you'll end up with ID marks that stay crisp and legible through years of sun, mud, and handling, whether you're tagging a handful of animals or running a full herd through before tagging season.
If you're setting up a dedicated ear-tag engraving workflow, pairing an OMTech Galvo Fiber Laser for metal hardware with a K40+ CO2 laser for plastic tag bodies covers both ends of the job without needing to invest in multiple specialized machines.
You may also be interested in the opportunities, details, settings, and limitations of laser engraving leather.